
Modding Skyrim is a well known hobby and since I started playing the game years ago I had some experience with it, at least on Windows. However due to the issues that this operating system is having with passing days one might wonder how to do the same but on Linux instead since gaming on Linux is quickly evolving.
Here I show how to install and configure ModOrganizer2 via a install script made by fellow brazilian Vitor Santos (rockerbacon), and some things to keep in mind during the process.
This guide is credited mainly to Ryan from the Intelligent Gaming Youtube channel, since I referenced the steps that he goes throught in his video and decided to expand it to give more intrisicate information.
But first, some considerations to have beforehand:
Vortex is another mod manager that works in a similar way of MO2, however on Linux this software is very fennecky when it comes to working properly.
This is manly due to the nature of the compartimentalization that Wine does, where it makes difficult to link the game folder with the program.
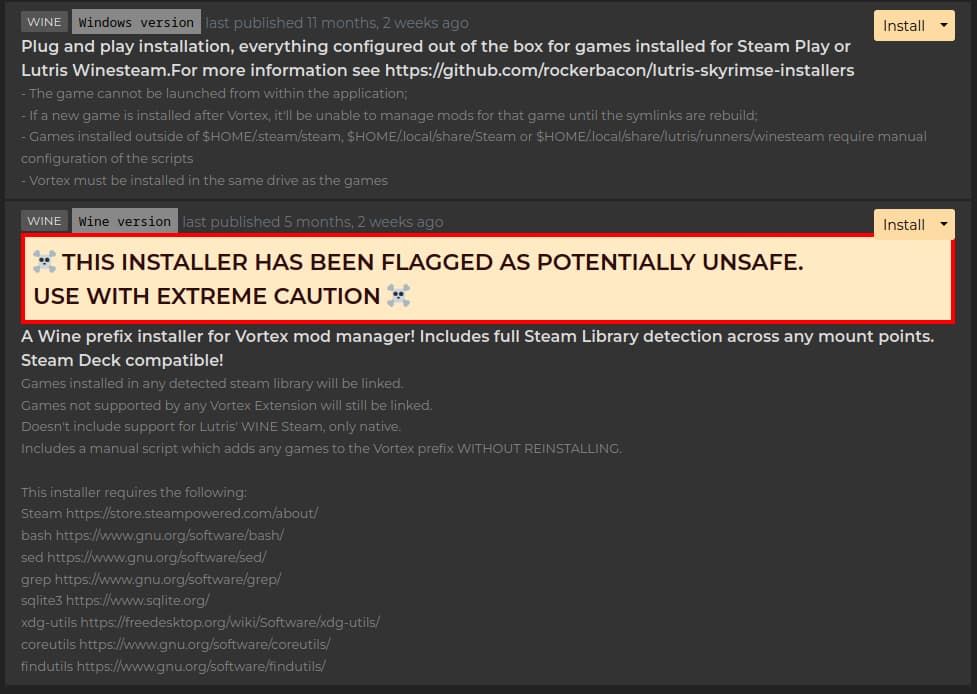
Another problem is related to having to use Lutris to set it up, and adding another layer of complexity to the setup. Also it came to my attention that one of the install scripts provided by Lutris is flagged as a potential security risk in their website.
I only managed to make this setup work once on Arch Linux, however it does not worth the pain in the ass.
If you are using Windows, Vortex is way better and easier to use compared to MO2 to the casual modder, but trust in what I say and avoid messing with it in Linux.
As I said up there, Wine does this thing where it installs the programs on a separate folder (.wine) that simulates a Windows enviroment for the compatibility layer.
Again the issue is linking the game folder to the software.
This could work in theory, but I did not managed to make it work on my machine.
Theoretically speaking, you could install the game via Wine on the steamapps folder, add it to your Steam as a “Non-Steam Game” and use Proton to run it in order to also install MO2 on top of it using the install script.
I did not tested this possibility but if I manage to, I will make a update on this guide.
For some reason the games takes a big performance hit when running it in Fullscreen, so always run it in Windowned Mode instead.
It is a little janky, but is usual from a Bethesda game (it just works).
Keep in mind that I will be using the original version of Skyrim (a.k.a. Oldrim, Legendary Edition, etc.) instead of the Special/Anniversary Edition because is the only version that runs on my old laptop. But the steps are the same neverthenless.
The part of the guide below is adapted from the video “How To Install and Use Mod Organiser 2 On Linux - Complete Guide” by Intelligent Gaming:
To my knowledge when it comes to modding games on Linux, there is no native mod manager, so instead we need to run these tools using Wine, a Windows compatibility layer.
Since we are going to be running Mod Organiser 2 using Steam Proton, we need to first install ProtonTricks as a dependency.
There are many methods for installing ProtonTricks, so choose the one that is most appropriate for your installation. Since I am on Debian I installed it via apt.
sudo apt install protontricks
Protontricks is also avaliable on Flathub for Steam Deck users.
MO2 Linux Install Script on Github
To install Mod Organizer 2, we will be using an installation script created by rockerbacon.
First, click on the Releases tab, download the latest build, and extract the archive.
Inside the extracted folder, there is an install.sh script wish will automate the installation of Mod Organizer 2.
To run it, open a Terminal window in the same folder, and run the following command.
./install.sh
The installation will begin, asking you choose what game you wish to manage, in my case this will be Skyrim.
In some cases the installer will ask if you want to backup your profile, however I got a error trying to do that, if this is not possible select the option to create a new profile instead.
You will get a warning about using and older version of Proton, and not setting any launch options, recently Steam released the new proton version 9.0.1 wich checks the requirements for the latest Proton version, so make sure that Skyrim is using this version by going into Properties -> Compatibility on Steam’s game settings.
If in doubt use Proton Experimental instead.
Click All Done, Let’s continue to proceed.
The wizard will next ask you where you wish to install Mod Organizer 2.
If you have a previous installation, it will ask you if you wish to update Mod Organizer 2 instead.
Once the process is finished, click Continue and close the Terminal window.
If you’re using Steam and Protontricks as Flatpaks and installed Mod Organizer 2 in a different directory, you need to give they permission to access that folder. You can use Flatseal to do that. If you don’t give permission for them to access the Mod Organizer 2 folder nothing will happen when you try to load the game (Steam shows the game’s not running anymore without any errors).
As part of the overall installation process, it will also install a script extender, in the case of Skyrim Special Edition, this will be SKSE, however this will be out of date.
To update this, download the latest build from the website and extract the archive.
Take a copy of all the files and folders inside extracted folder and paste into the games main directory.
The easiest way to navigate to this, is to open Steam, right click on the properties of the game, click on the Local Files tab, and click the Browse button.
This should open the game’s directory in another tab in your file browser, so paste the files inside here and overwrite when prompted.
To launch Mod Organizer 2, simply launch the game using Steam.
If this is the first time you have launched the application, you will get a prompt to choose a portable installation, and specify the location of the game and the modding folders.
Ryan recommends choosing the non-portable installation and leaving the locations as suggested. I used the portable installation instead for reasons that I show down below in, didn’t got any problems so far.
Once the main interface of Mod Organizer 2 has loaded, you can add mods by clicking on the icon at the top and navigating to where the mod archive is located.
Once you have installed your mods, create an optimal load order by clicking the Sort button under plugins.
Finally, select SKSE from the launch options, and click the Run button to load the game with the mods enabled.
LOOT (Load Order Optimisation Tool) is a software that as the name says, optimizes the load order of your mods and resolves conflicts between then with some simple clicks.
This tool is built in Vortex and MO2 as far as I know, however in MO2 we can install it manually too.
The software also have a version for Linux via Flatpak, however we gonna install the Windows version via Wine.
Install it via Wine, if the program does not start don’t worry, we will fix this with Proton.
Mod Organizer has a feature to add executables as shortcuts to be launched from the program. We can use this to launch tools such as LOOT and Bodyslide/Outfit Studio wich we will see later on.
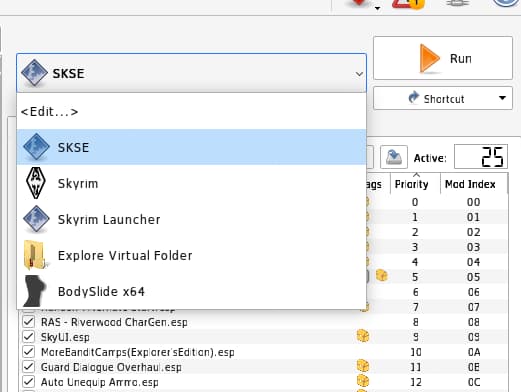
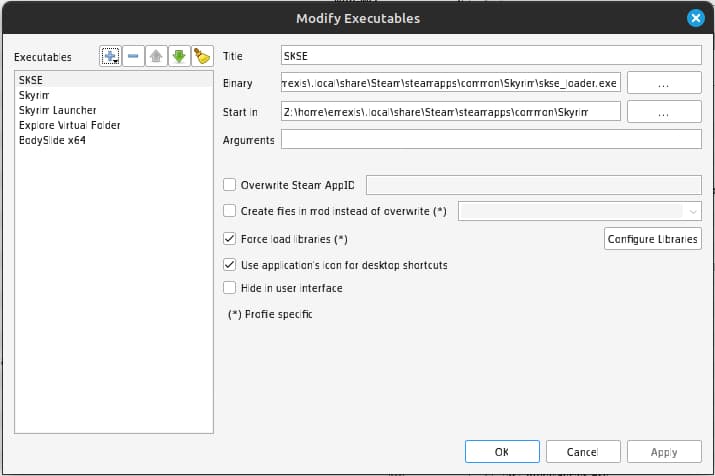
Select the application list (near the “Run” button) and chose “Edit”. Notice that it will open a menu listing your options to launch, select the “+” icon and “add from file” to add a new executable to the list.
The Wine file manager will pop up asking for the executable, here you need to “escape” from the Wine enviroment and acess the Mods folder that the installer created for you in your /home folder.
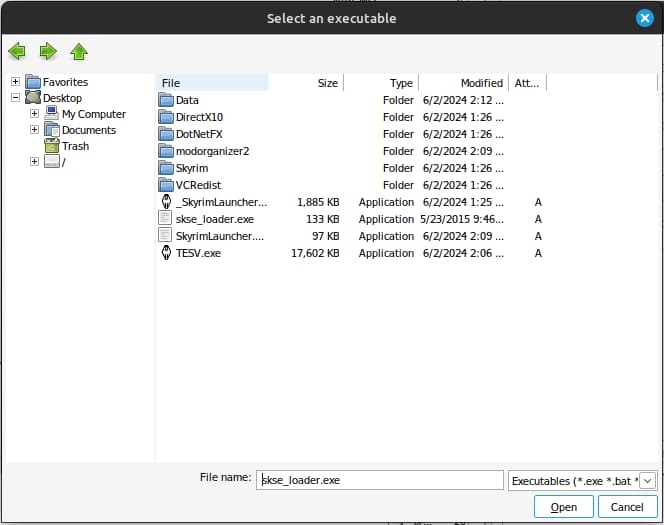
To do this select “/” to acess the Linux filesystem and go to /home/user/.
LOOT is installed in your default .wine folder, however the Wine file manager can’t see hidden files from the Linux filesystem.
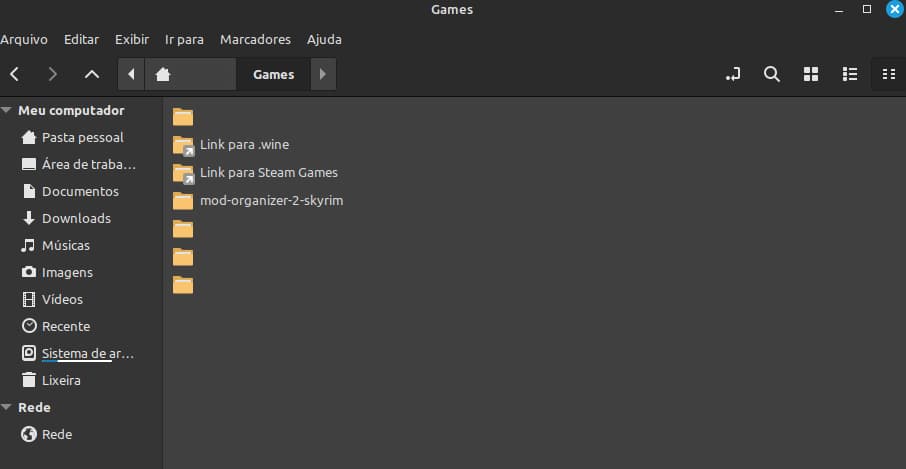
To fix this, create a link to the .wine folder using your file manager. For example, by using Linux Mint select the folder in Nemo and create a link by going into Edit -> Create Link (Ctrl+M). This can be different depending of your desktop enviroment and file manager.
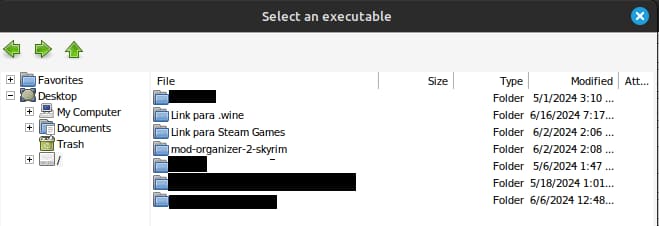
LOOT is located in /home/user/.wine/drive_c/Program Files/LOOT/LOOT.exe, but since we are using a symbolic link, it should look something like /home/user/Link to .wine/drive_c/Program Files/LOOT/LOOT.exe
Then, run LOOT from inside MO2 by selecting it in the application menu and selecting Run.
…yeah…we all know why you want to use this tool…
Anyways, install Bodyslide using the instructions seen before in the 4th step. Just like when installing LOOT, select the application list, choose “Edit”, select the “+” icon and “add from file” to add a new executable to the list.
By default the mod folder path is installed in /home/Games, so we need to get the executable from there.
The Wine file manager will pop up asking for the executable, here you need to “escape” from the Wine enviroment again and acess the Mods folder that the installer created for you in your /home folder.
To do this select “/” to acess the Linux filesystem and go to:
/home/user/Games/mod-organizer-2-skyrim/modorganizer2/mods/BodySlide and Outfit Studio/CalienteTools/BodySlide/BodySlidex64.exe
To add more body presets, place them directly into the “SliderPresets” folder or install them as mods in MO2.
FNIS (Fores New Idles in Skyrim) is a mod that allows to add different types of animations to the game: idles, poses, killmoves and such.
If installed in Vortex FNIS always run after each deployment, but in MO2 we will need to do this manually.
Select the application list, choose “Edit”, select the “+” icon and “add from file” to add a new executable to the list.
Acess the Mods folder that the installer created for you in your /home folder. Select “/” to acess the Linux filesystem and go to:
/home/user/Games/mod-organizer-2-skyrim/modorganizer2/mods/FNIS Behavior/tools/GenerateFNIS_for_Users/GenerateFNIS_for_Users.exe
Run FNIS from inside MO2 by selecting it in the application menu and selecting Run. When adding new animations you will need to update FNIS afterwards via the executable.
While Vortex has a feature to install multiple mods at the same time via drag-and-drop, M02 only allows for installing one mod at once, however if you made your install a portable one, you can copy the entire MO2 folder and paste it in a different install. This is great for migrating your mod setup to different machines.
In my case I first started this modding setup in my Linux laptop, but I built a beefier desktop that is running Win10 (at least for the time being).
The main thing to be aware in this process is to redo the file paths for Skyrim's executables, SKSE and so on.
In Linux, due to compartimentalization the filepath in MO2 looks something like this:
Z:\home\USER\.local\share\Steam\steamapps\common\Skyrim\
Z:\home\USER\Games\mod-organizer-2-skyrim\modorganizer2\mods\
In Windows by default MO2 is installed in C:\Modding\MO2, with that in mind you can select the application list (near the “Run” button) and chose “Edit” to edit the executables, click on "..." to open the file explorer and point the executables to their right places:
C:\Program Files(x86)\Steam\steamapps\common\Skyrim\
C:\Modding\MO2\modorganizer2\mods\
After installing the program, you can replace the installation folder with your own already modded folder and then redo the paths for the executables.
By logic the same can be said in the reverse process (porting a Windows mod load into Linux), the only thing to keep a eye for is the version of the software.
I always tought that modding Skyrim on Linux was a pain in the ass, but it turned out to be way easier (or less complicated) than I tought before.
If you have more time with Linux, you already know that things like this are somewhat complicated compared to Windows, when I migrated and was first trying this (basically two years ago) I got angry for failing to make this work, but with more experience and understanding it is possible.
The same steps of this guide can be replicated in other Skyrim versions and also in the Fallout series by using the same installer, since it creates one MO2 instance for each game.